Maddie and Laura’s Mini Tartlets in Gluten Free Shortbread Crusts
Perfect for a baking day with a child. There are plenty of jobs you can give them to help you. Plus everyone will enjoy eating these lemony mini tartlets or one larger tart cut into slices. They're perfect to bring to a shower or a dessert bar!
Ingredients
Mini Tartlets Gluten Free Shortbread Crusts
- 2 Tablespoons brown sugar
- 2 Tablespoons organic cane sugar or granulated sugar
- 4 Tablespoons chilled butter cut up into small pieces
- pinch of salt
- 1/2 cup almond flour gluten free
- 3/4 cup all purpose 1 for 1 gluten free flour (I use Bob's Red Mill Gluten Free 1 to 1 Baking Flour)
- 1 teaspoon pure vanilla extract gluten free
For the Whipped Cream:
- 1 cup heavy whipping cream whipped
- 1 1/2 tablespoons sugar or powdered sugar
- 1 teaspoon pure vanilla extract gluten free
- 6-8 tablespoons store bought lemon curd or homemade (if you prefer) for Laura's Meyer Lemon Curd recipe. For the layer of lemon curd on the bottom of the mini tartlets or larger tart crust:
- 1/2 pint raspberries and 5-6 strawberries washed and dried and the strawberries sliced, (the adult should help with this) or 1 1/2 pints total of raspberries and strawberries mixed
Instructions
- Preheat oven to 325 degrees with the rack in the center of your oven. (use 350 degrees if making an 8" tart)
- Combine ingredients in the bowl of a Kitchen Aide mixer, or use a large bowl and a hand mixer. You may also choose to mix by hand, cutting in the butter with a pastry cutter or two knives, slicing across the butter pieces until there are no pieces remaining that are bigger than peas. If using a mixer, combine all the ingredients on low speed, then increase to medium low and mix until texture appears crumbly and no large pieces of butter are remaining. Use your hands to press the butter in with the flour to make the dough start to stick together.
- Grease the bottom of the mini tartlet cups with a very small pat of butter. If making a larger 8" tart, place a circular piece of parchment (does not need to go up the sides) on the bottom of a 8 or 9" removable bottom tart pan or a 8 or 9" springform pan with a removable bottom, lined with parchment that goes up the sides.
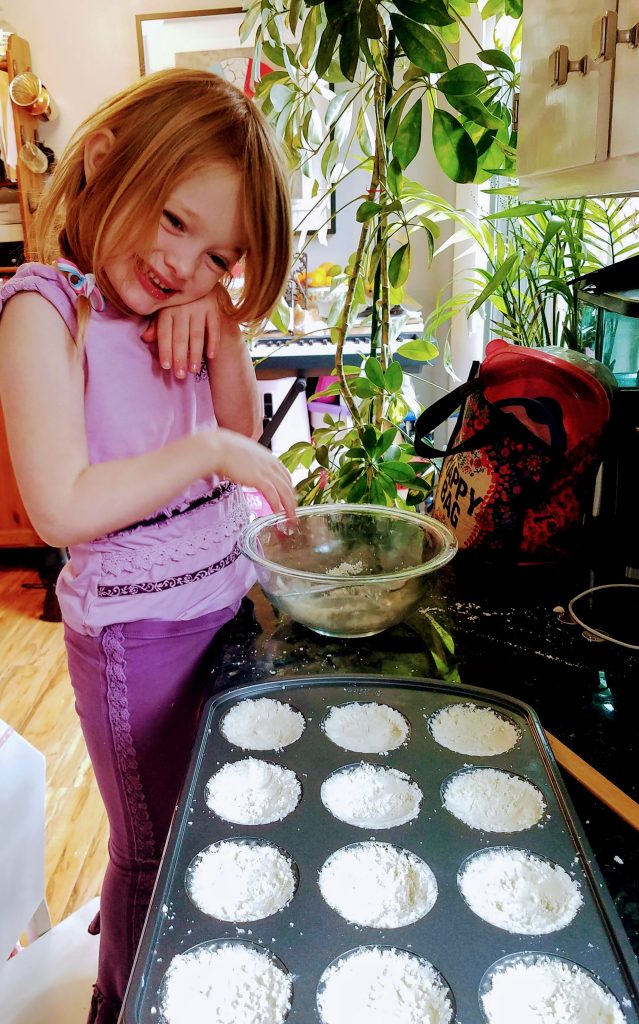
- Spoon a few spoonfuls of dough into each of the mini cups and press the dough into the cups and up the sides, as evenly as you can. Or pour the dough mixture from the bowl into the larger parchment lined tart pan and proceed to press the tart mixture, with a spoon or spatula, evenly on the bottom and up the sides a bit.
- Bake for 10-13 minutes for the mini tartlet pan, or 13-15 minutes or until light golden brown on bottom and edges. Remove to a wire rack to cool completely.
For Whipped Cream:
- Starting with the whipping of the cream, pour the heavy cream in your Kitchen Aide or a medium stainless bowl if using a hand mixer or mixing by hand. Start the mixer on low (wire whisk attachment of Kitchen Aide) or use a whisk to whip by hand. Whisk quickly, if by hand, fluffing the cream with the whisk and stirring in a firm circular motion. (This is what Maddie and I did! You'll also get a workout!). If using a stand mixer, increase the speed after a minute or so, to medium high.
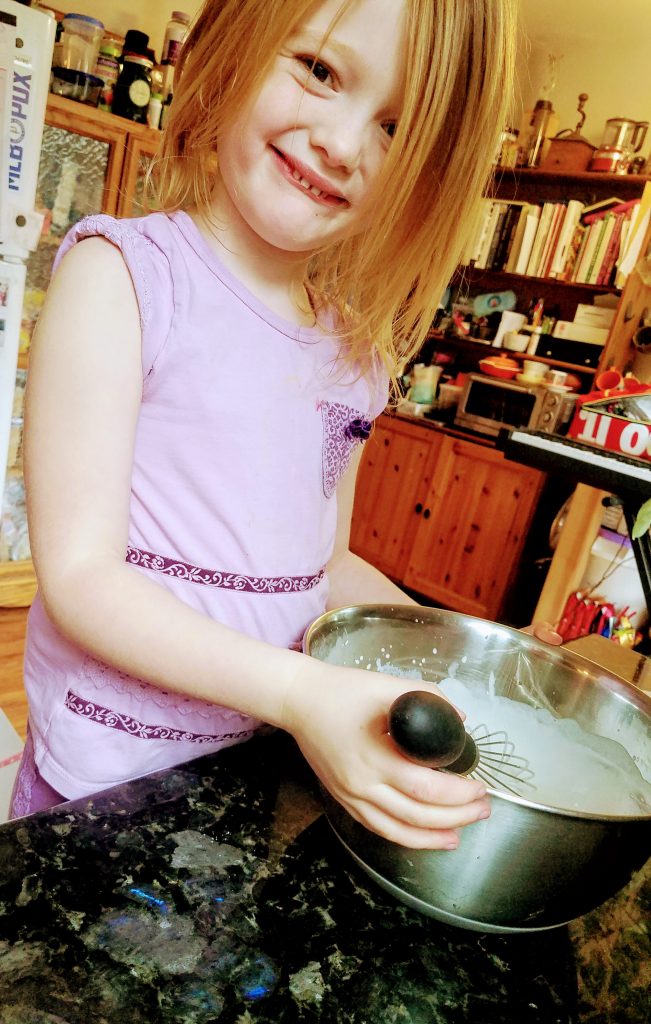
- When the cream starts to thicken and you see lines starting to form, add 1 teaspoon of vanilla and 1 tablespoon of sugar. Continue mixing until fluffy and thick. Don't over mix if using a stand mixer or hand mixer. Give a solid stir after removing whisk. This will set the cream.
- Refrigerate the whipped cream until ready to use.
- Remove the cooled mini tartlets to a tray using a butter knife, (this step for the helping adult) going around the edges to loosen lightly before popping out gently with the bottom of the knife. For a larger tart, I leave the tart in the tart pan or springform pan until after decorating.
- Spoon the Meyer Lemon Curd into the into the bottom of each mini tartlet cup (or reserve some without as Maddie prefers!). Sometimes store bought lemon curd can be quite firm. If this is the case, simply put a the lemon curd in a small microwave cup and microwave on medium low for 20-25 seconds.
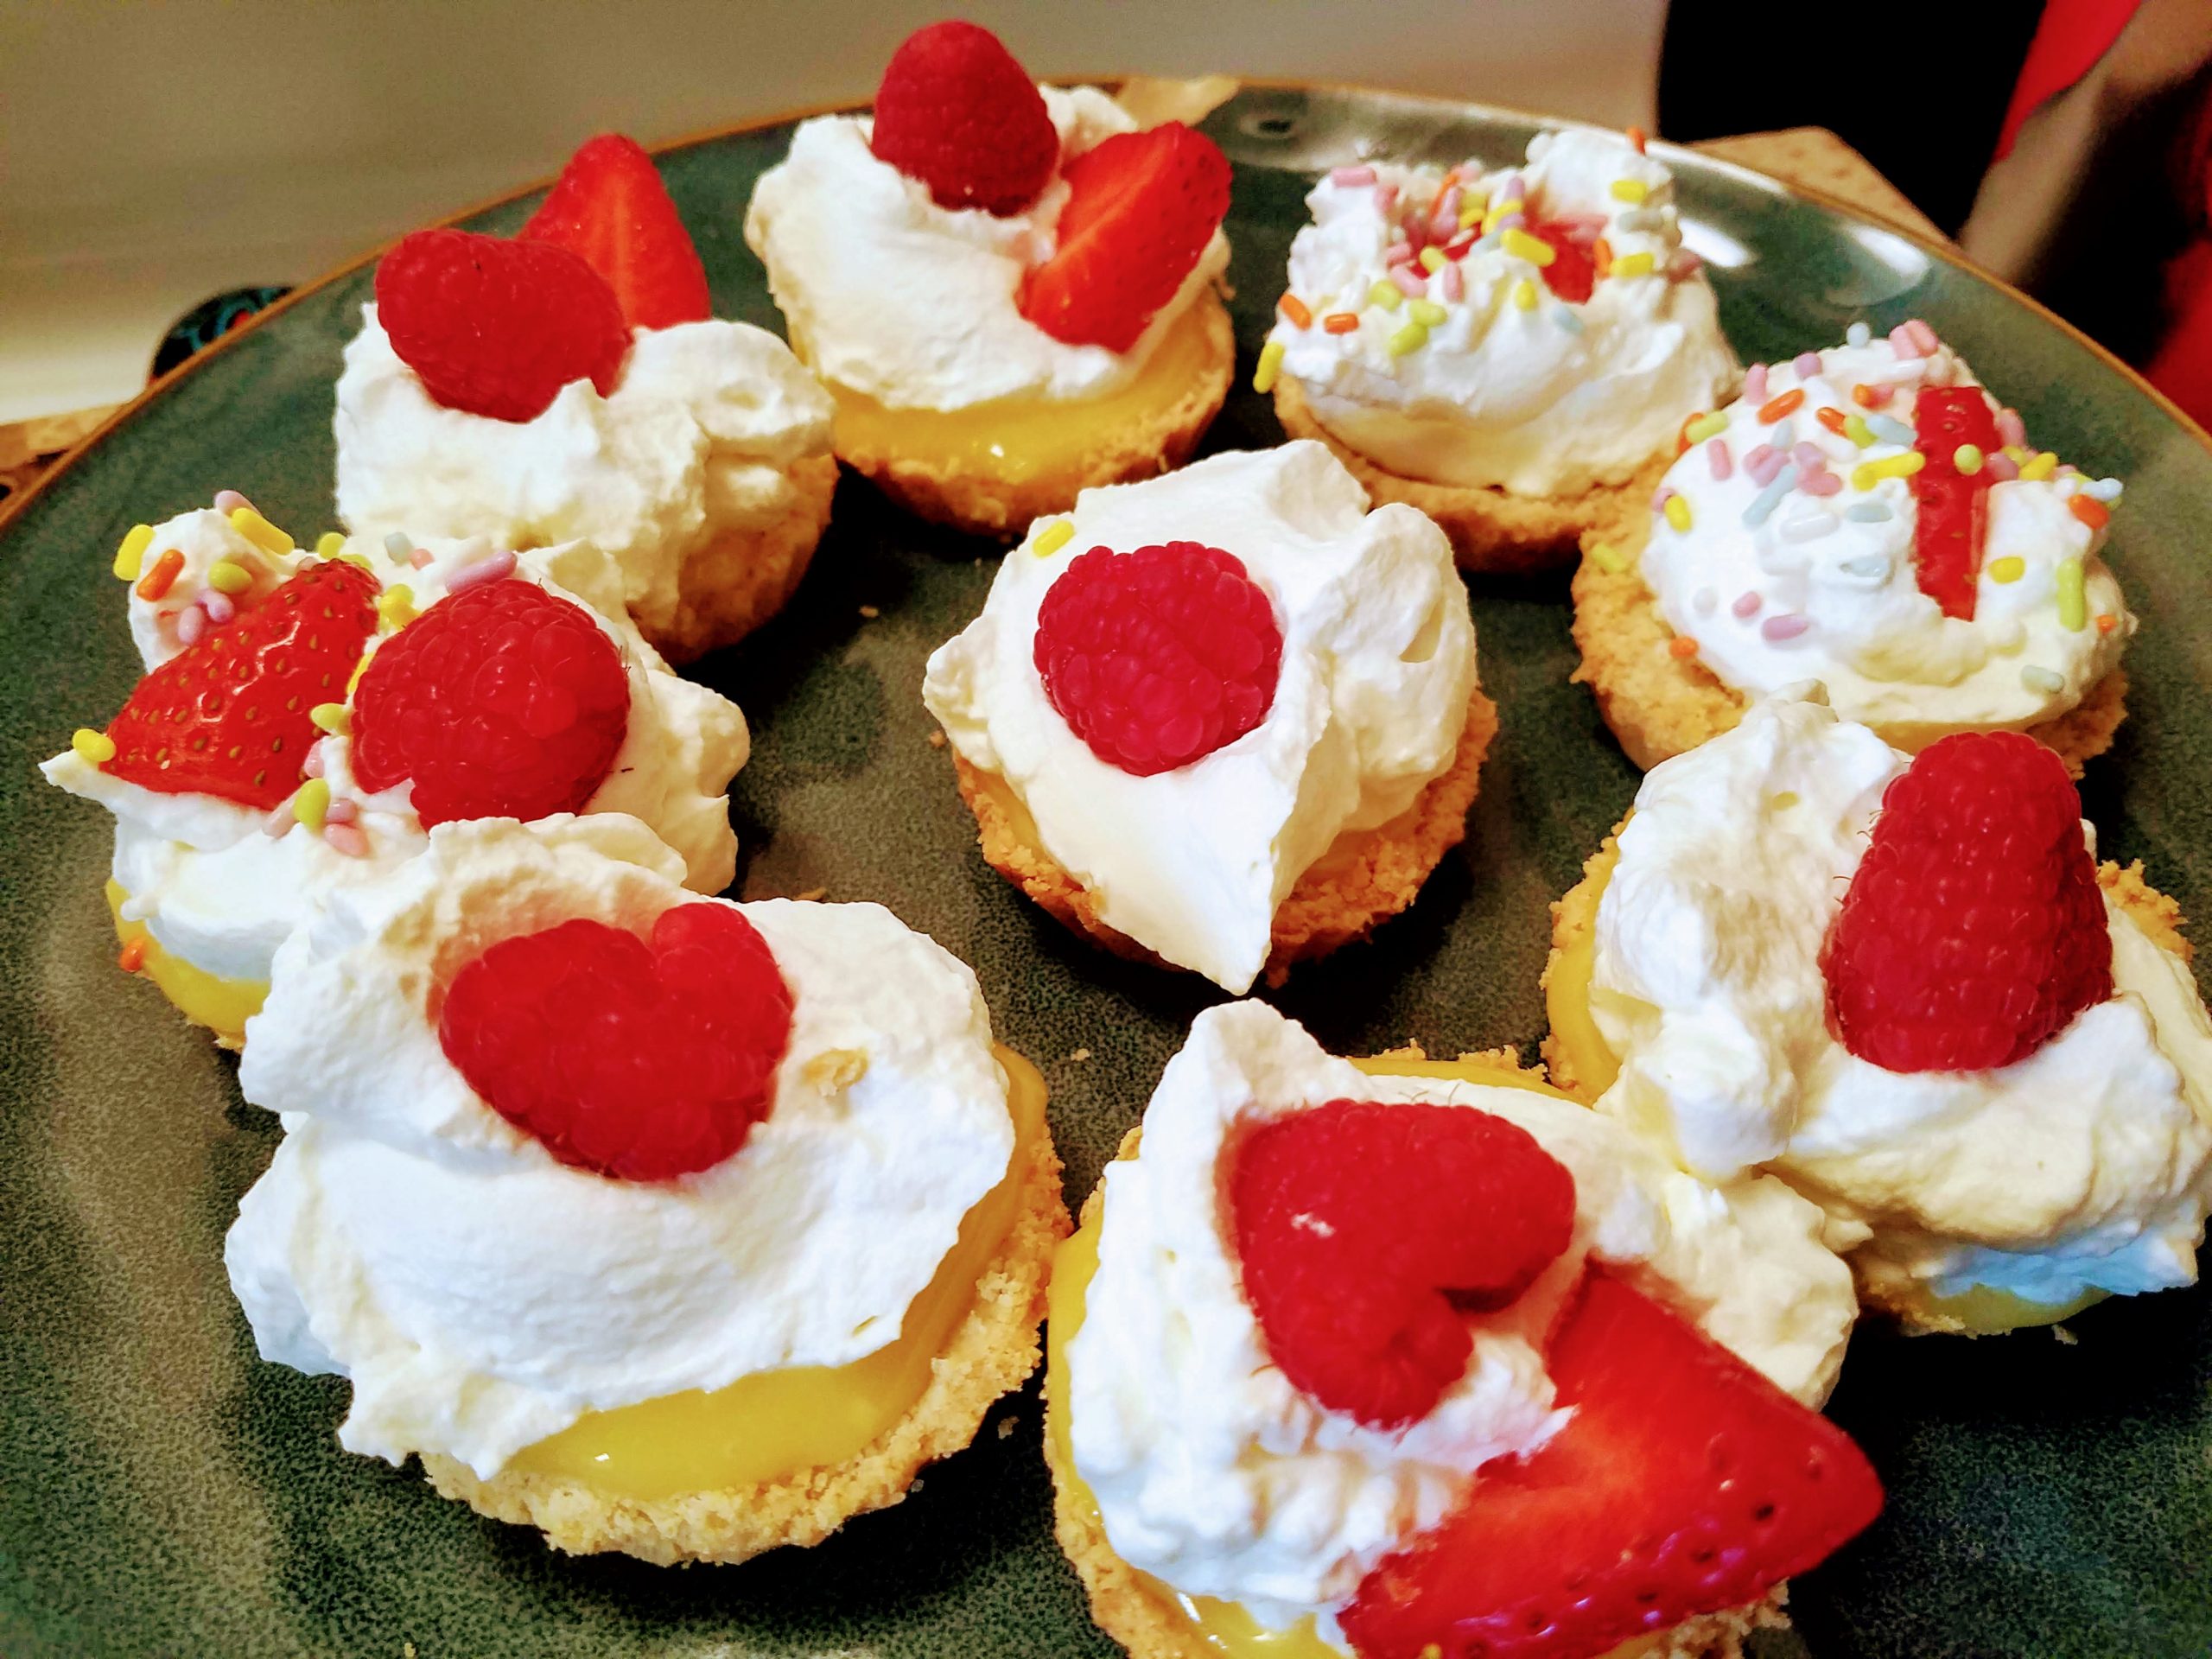
- Top the mini tartlets with a dollop of whipped cream each. If making a larger tart, spread the whipped cream over the lemon curd with a spatula. Or fill a pastry bag using a medium star tip, with whipped cream pipe a small amount on the mini tartlets.
- Decorate the top of the tartlets or larger tart with the raspberries and strawberry slices. Use colorful sprinkles for the final touch (but make sure they are gluten free). You can carefully lay the berries in a pattern or just toss on the top for a larger tart. Your choice!
- Remove the sides of the larger tart's springform pan or the bottom of the tart pan. Slide the tart off the parchment paper and onto a cake plate.
- Place the tartlets or tart in the refrigerator for at least 2 or 3 hours to chill well. You can also make the tartlet crusts or tart crust the day before putting together. Store with foil over the tart shells in making in advance.
Notes
Sometimes, you also need to eat one right when you finish putting them together! After serving and enjoying, be sure to refrigerate in a sealed tupperware, any remaining. Best when eaten the same day or the day after. Makes 12 mini tartlets or one 8" tart, which will serve 6-8 people.